How to install your decal:
A guide for applying vinyl graphics
Materials
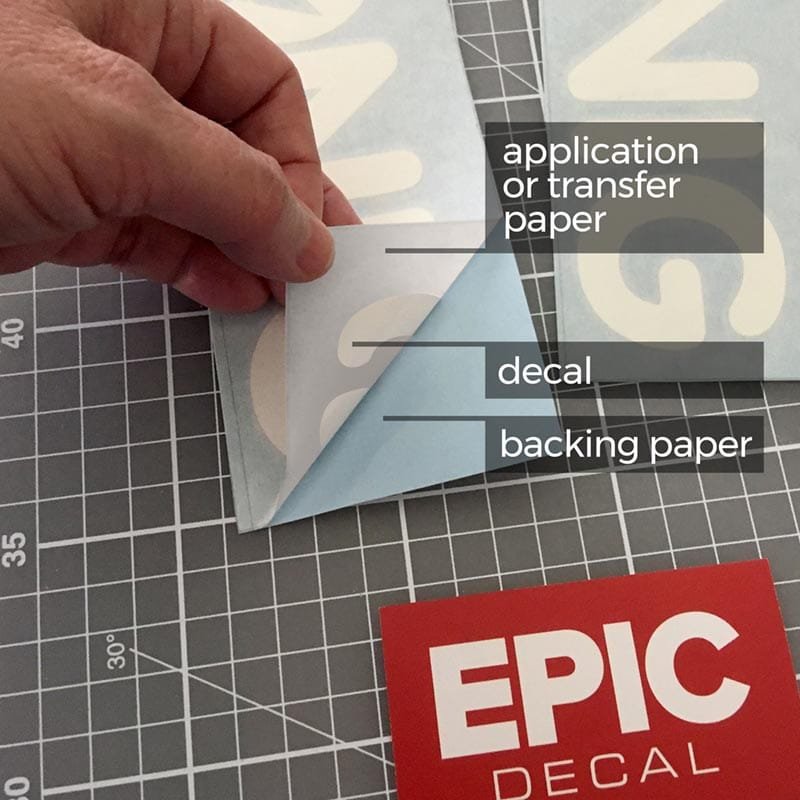
- Vinyl decal (comes in three layers: Backing, vinyl and transfer tape).
- Squeegee (can also use an old credit card)
- Surface Cleaner (Isopropyl alcohol with a spray bottle works well)
- Application Solution (3 parts water, 1 part isopropyl alcohol, 3-4 drops of dish soap or baby shampoo)
- Tape Measure
- Masking Tape
- Lint Free Towel or Cloth
- China Marker or Grease Pencil
Preparation
- For best results, room temperature and the temperature of the intended surface should be between 50° and 90° F.
- The surface you intend to install your vinyl graphics on should be smooth and clean. Surfaces with too pronounced a texture make it difficult for the decal to adhere.
- Clean the surface thoroughly with isopropyl alcohol. Before the alcohol evaporates, wipe dry with a lint free cloth. This insures the surface is free of dirt, oil, and wax. Test a small inconspicuous area first when you clean.
Installation
- Before you begin, position the decal on your surface and determine where it will go. For larger decals, I like to find the centerpoint and mark the transfer paper. Then, measure and find the center of the area you’re applying the graphic to. Next, line up the decal and the area. Use masking tape to tape the decal onto the area. It’s always a good idea to measure several times. I use a grease pencil to help determine exactly where the decal will go.
- Next, create a hinge on the top of the decal, apply a horizontal strip of masking tape over the top edge of the graphic. This makes sure your graphic stays in place for the installation.
- Hold the bottom edge of the graphic away from the surface and remove the paper backing from the top. For larger graphics, you may want to cut between the letters with scissors and apply in smaller sections. Make sure the vinyl doesn’t fall back onto itself—decal to decal will stick together quickly.
- While holding the graphic away from the surface, spray the surface and the adhesive with the application solution that you mixed earlier. Using the squeegee, and starting from the top, center—begin to apply pressure to the application tape and slowly work your way down to the bottom. Always work from top to bottom and make sure the entire graphic doesn’t fall onto the surface. Using overlapping strokes and working slowly from the top will help avoid air pockets in the vinyl.
- Starting at the top again, use firm pressure with the squeegee to force the application fluid out from underneath the vinyl. Allow a few minutes for the vinyl to adhere to the surface.
- Now you are ready to remove the application tape. Spray the tape with your application fluid mixture. Wait a few minutes for this to soak in until the tape begins to bubble and wrinkle. Remove the app tape by gently pulling the tape at an angle to reveal the graphic underneath. Be careful not to pull straight away from the surface as this may cause the vinyl to release or cause air bubbles.
- Using the paper backing that you removed earlier, squeegee the vinyl again with the paper backing over the vinyl to protect it from scratches. This step allows you to force any additional moisture and air from under the vinyl. Use a pin to poke any air or water pockets and press them with your finger.
- CONGRATULATIONS! You’ve installed your vinyl graphics successfully. Stand back and admire a job well done.
Instructions from the Manufacturer
For more information, please review the manufacturer’s technical specifications on installation and care of your decal.